Model Creation Guide
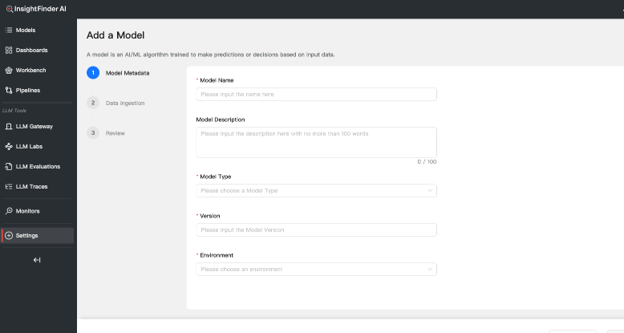
1. Add a New Model
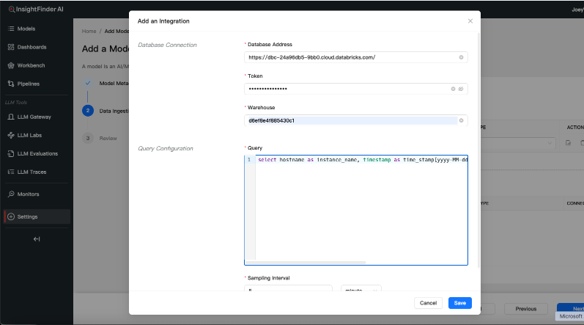
- Navigate to Settings → Add a Model
- Fill in the required model information based on your needs
- Select Databricks as the model’s data source
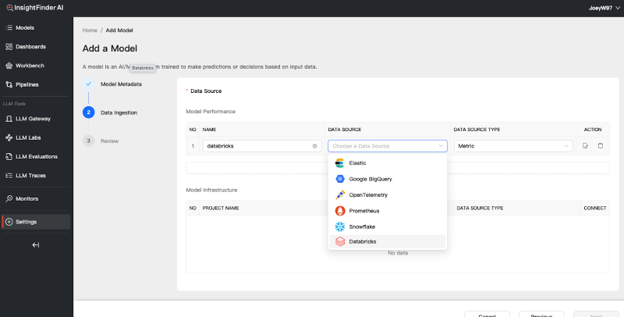
2. Databricks Configuration
Workspace URL
- The Database Address is your Databricks Workspace URL
- Sign in to your Databricks workspace and copy the base URL from your browser

Access Token
- In your Databricks workspace:
- Click your user icon (top-right)
- Go to Settings → Developer → Access Tokens
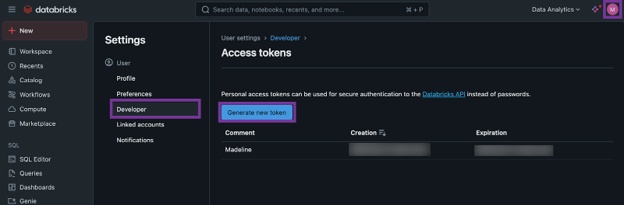
3. Click Manage → Generate New Token
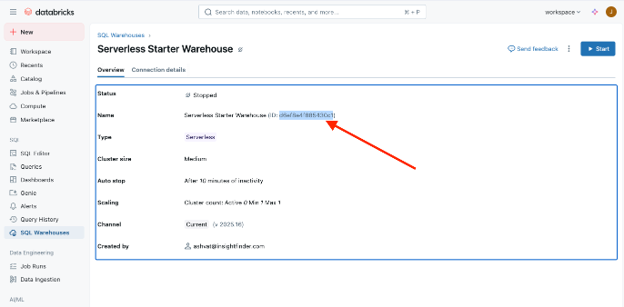
Warehouse ID
- Navigate to the desired warehouse
- Copy the Warehouse ID from the warehouse Overview section
3. Query Settings
General Metric/Log Monitoring
To stream monitoring data from other systems stored in Databricks, you can write queries that fetch and forward the data to InsightFinder.
Query Requirements
- Must return valid timestamp(s) and instance name(s)
- The column for instance name should be labeled as:
instance_name - The timestamp column must:
- Be formatted correctly (e.g., yyyy-MM-dd HH:mm:ss)
- Be labeled as:
time_stamp
- Query must include both the schema and table names
Example Query
SELECT
NAME AS instance_name,
START_TIME AS time_stamp[yyyy-MM-dd HH:mm:ss],
CREDITS_USED_COMPUTE,
CREDITS_USED_CLOUD_SERVICES,
CREDITS_USED
FROM ACCOUNT_USAGE.METERING_HISTORY;
Metric Query Result
- Each column (except time_stamp and instance_name) is treated as a metric if the value is a valid number
Log/Trace Query Result
- Each row (excluding time_stamp and instance_name) is treated as a log entry
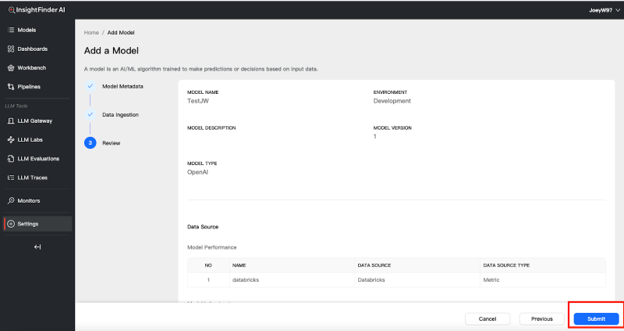
4. Finish Model Creation
- Click Next
- Review the model overview
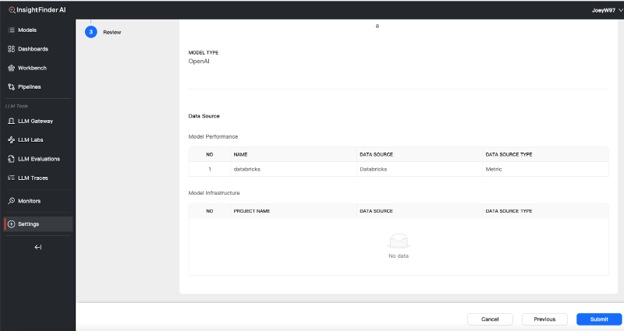
Click Submit if everything looks good