Prerequisites
- An active InsightFinder account.
- Jira credentials or API token with permission to create issues in the desired project.
You can generate a Jira API token here: Atlassian API Tokens
Configuration Steps:
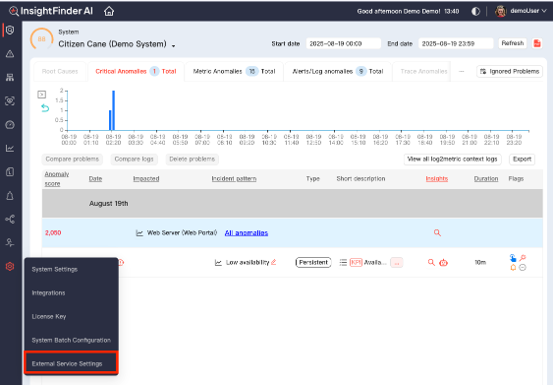
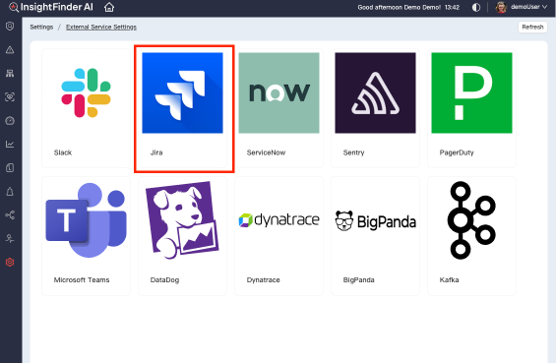
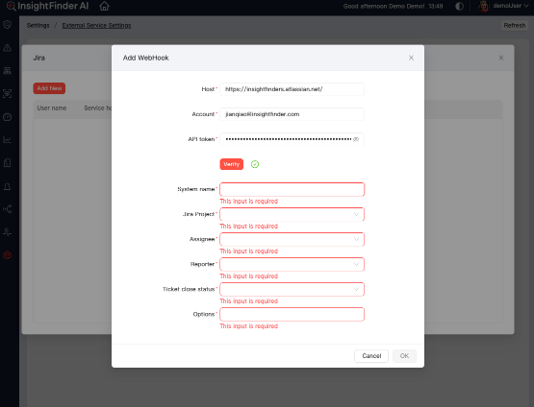
- Log into InsightFinder and navigate to Settings > External Service Settings > Jira Integration.
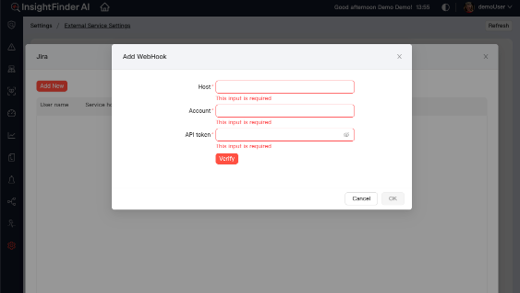
2. Enter Jira connection details:
- Jira URL (Cloud or Server)
- Jira Account (your Jira username or email)
- Jira API token (from the prerequisite step)
3. Configure Ticket Creation Settings
After verifying your Jira account, configure how tickets should be created
- System Name: Select the InsightFinder systems where incidents should trigger Jira tickets.
- Jira Project: Choose the Jira project where new tickets will be created.
- Assignee: Specify the default assignee for newly created tickets.
- Reporter: Define who will be listed as the reporter of the ticket.
- Ticket close status: Set the Jira status to apply when an incident is closed in InsightFinder.
- Options: Choose which types of alerts will generate tickets. Supported options include: New Pattern Alert, Detected Incidents, Predicted Incidents, Root Cause
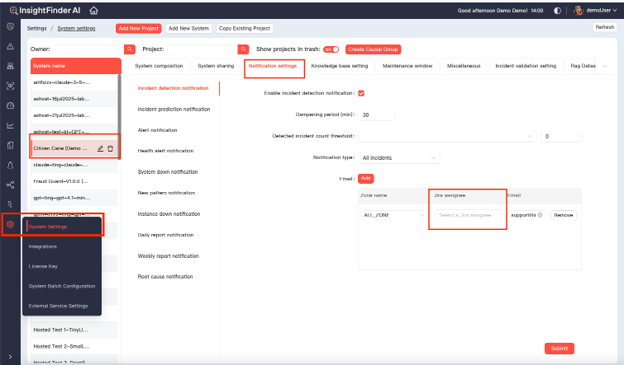
4. (Optional) Zone-Based Assignment
To assign Incident from different zones to different Jira users: Settings > System Settings > Notification Settings. The default assignee from step 3 will be used if no zone-based override is defined.
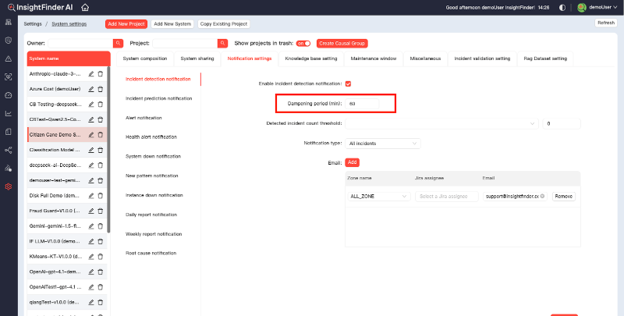
5. (Optional) Ticket Creation Dampening
To prevent duplicate tickets for recurring incidents of the same pattern, you can configure a dampening period. During this period, InsightFinder will suppress additional Jira ticket creation for matching incidents.
Note: This dampening period is shared with email notification.
6. Check Jira Ticket Created by InsightFinder
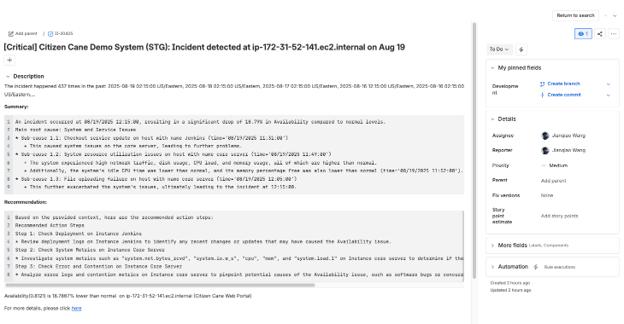
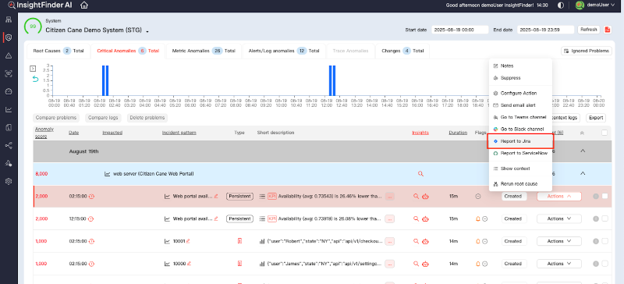
Manually Create Jira Ticket for InsightFinder Incidents
After Jira integration is configured, InsightFinder will create user can manually create Jira tickets for incidents from InsightFinder Timeline